Whether you are moving by yourself or hiring professionals, it always helps to know what tools you’ll need when it’s time to pack up your belonging in preparation for relocation. Movers’ wrap is one of the essential tools you will need to protect your belongings and ensure your move is a success. Professionals use this all the time, but you can too! The following is a quick look at what professional movers’ wrap is, why you might want to use it, and how you can use it most effectively.
What Is Movers’ Wrap?
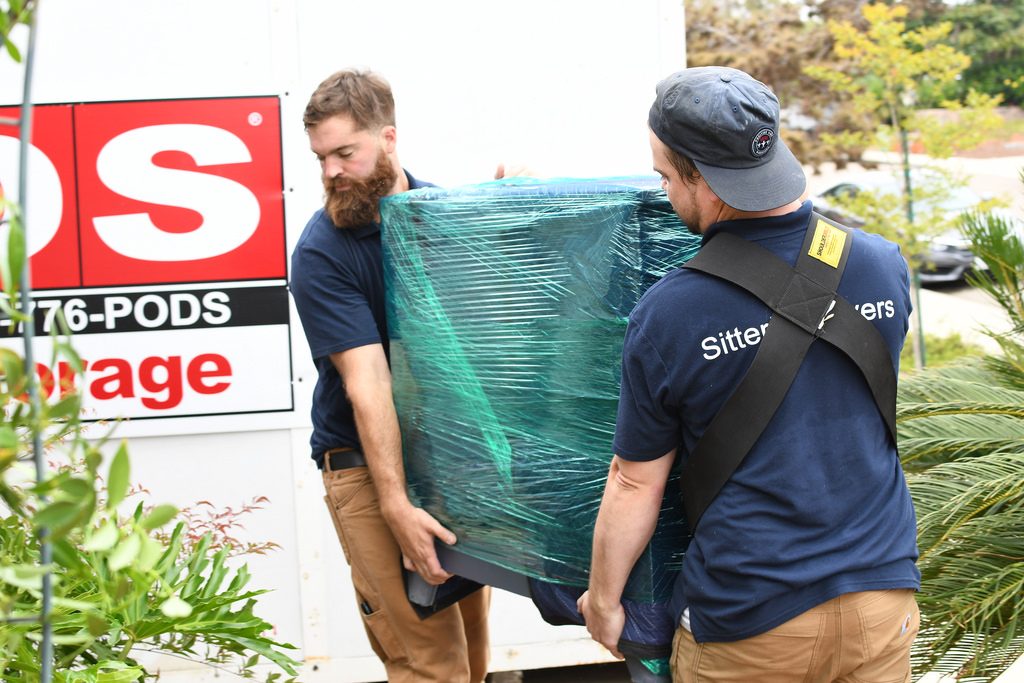
Mover’s wrap is similar to the shrink wrap most people keep in their kitchen. The difference is that mover’s wrap is much sturdier and comes in larger rolls that are more suitable for covering furniture and wrapping belongings of various sizes. Like the kitchen stuff, mover’s wrap doesn’t cling to other surfaces but will cling to itself. This makes it ideal for moving as it won’t damage the furniture or artwork it is wrapped around.

Why Use It?
There are several reasons you might want to use mover’s wrap. Some of the main ones include:
1. Cut down on moving costs
If you’re hiring professional movers, you can reduce the cost by packing and wrapping your belongings yourself.
2. Protect furniture and artwork
Mover’s wrap can protect objects from scratches, moisture, and abrasive damage.
3. Compress large bundles or objects
Mover’s wrap can be used to keep rugs held together and to compress things like bedding, so they take up less space.
4. Keep draws shut and various components together
This wrap is also a great way to keep drawers from sliding out of furniture and can keep sets of objects like shelves or bed rails together.
Tips for Using Mover’s Wrap Effectively
1. Make sure everything is clean and dry
You don’t want dirt or moisture trapped between plastic wrap and your furniture when it’s traveling in the back of a hot moving van. To avoid potential stains or damage, make sure everything is clean and dry before wrapping it.
2. Add padding
An excellent way to ensure moisture doesn’t get trapped under the plastic is to wrap your artwork, leather goods, or other moisture-sensitive objects with packer’s paper before wrapping. Delicate objects should be wrapped in blankets or padding before the plastic is added.
3. Reinforce the corners
For extra protection, add cardboard or foam to the corners of your belongings before wrapping them securely in the mover’s wrap.
4. Add the plastic
Once you’re ready to add the plastic, it’s Cheap Movers Miami says it’s best to have an extra person on hand. Most rolls of mover’s wrap come with easy-to-use handles. If your roll doesn’t, you might want to get one first. When you’re ready, have one person steady the object and hold the beginning of the wrap in place while the second person wraps the plastic around the object. Be sure to overlap the plastic as you go and completely encase whatever it is you’re wrapping before cutting the wrap with a pair of scissors. The wrap will stick to itself, but you can tuck in the end or secure it with a piece of tape for added peace of mind.